Disclaimer: As an Amazon affiliate, I may earn a small percentage from qualifying purchases. This is at no extra cost to you. Learn more here.
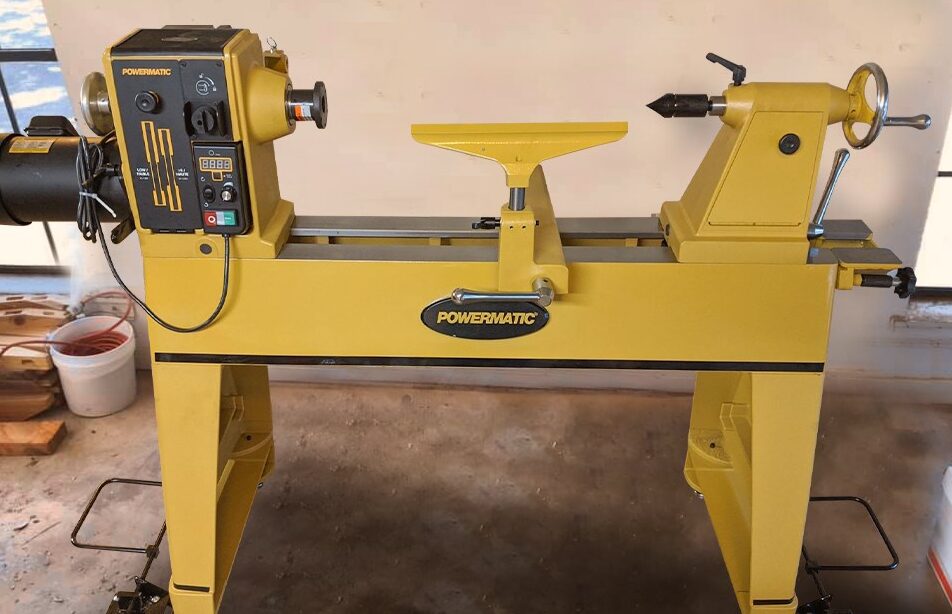
Once you brought your wood lathe into the shop, now it’s time to set it up properly. This is an important thing to consider before start working on the lathe if you want your machine to be highly responsive.
Now, if your lathe is a 10″ or 8″ mini wood lathe, it’s pretty offhand to move them wherever you want them to place. But if it’s a larger one and likely to remain in one place for a longer period of time, then you’ve got work to do.
So, I am here to help and remind you of some useful tips and a checklist to get the overall idea and start setting up the wood lathe accordingly.
9 Step Checklist To Setup Your Wood Lathe
I will try to keep things nice and simple so it becomes easy to understand. Take care of these simple factors and you can make the whole process of wood lathe setup easy.
It will also allow using the wood lathe much more comfortably. Aside from these tips, a little creativity of your own will make the craft more enjoyable for a longer time.
1. Fix the placement
Okay, so first thing first. It would be best if you decided where you want to place your lathe in the workshop. If it’s a benchtop or midi lathe without an extra leg or extension, then you can set it anywhere as it won’t take much of your space.
But anything larger than a 14″ inch swing normally will have a larger distance between the centers. In that case, most shop owners place their tools against the walls and keep the front free for easy access.
So, don’t place the lathe too close against the wall. This will give hard times when working on a big blank.
Turning woods potentially produce a high amount of dust and chips. Set it somewhere, so you get enough room for your dust collector behind the lathe.
2. Securing the stand firmly with the floor
Yes, very important. Because, the more stable it is, the more fun with turning on the lathe.
Now for a mini lathe, you can bolt it down on the top of the bench, so it doesn’t slip or move away with the vibration. You can also buy or build your own lathe stand if you want to.
Coming to the full-size wood lathe, it comes with a default stand. They are sturdy cast iron made, but you want to secure it firmly to the flat surface.
Not every time you are going to mount nice and balanced logs of woods on the bed. Bolting down some strong nuts to the footprint, keeping sandbags for extra weight will do it.
3. Assembling the headstock and tailstock on the stand
As you know, the lathe doesn’t come in one piece, so you need to assemble it. The parts are usually needed to be attached separately, one after one.

In this case, you might call your friend as you’ll be needing an extra hand to lift these parts. The headstock and the tailstock are the heaviest components of your lathe after the stand, especially the headstock. So be careful.
There are plenty of videos on Youtube where you can get the idea. Try to see the unboxing of a particular unit you bought as not all the processes would be the same.
Here’s an example for a full-size wood lathe.
4. Setting up the rest of the components
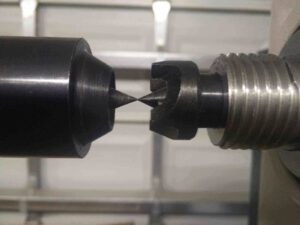
Check your spur center if the points are in good shape and the spurs are not damaged or bent. Then examine the live center and check the point carefully. You need to make sure that the bearing of the live center is rotating freely and smoothly.
You can also use a compressor (if you have any in the workshop) to test the Morse Tapers and then put your spur centers back there.
5. Check the alignment between the centers
It is very important that you inspect the alignment of the drive centers after putting them into the tapers.
Move your tailstock towards the headstock and see if the tips are aligned parallelly. If not, you can adjust it from the headstock.
However, I would like to write a separate article on this soon, showing how to do it.
Now once you are all set, keep the tailstock as it is and turn the wood lathe on. This is to see if turning it on makes the rotation wobbly.
I hope everything will go smooth back there.
6. Sanding and lubricate the bed of your wood lathe
A polished bed will help the extensions move smoothly. You can use a 400 frit sandpaper (amazon link) like this one.
Remove your tailstock and the tool rest off the bed and start sanding the surface. This will ensure better movement of the tool rest and the tailstock. Don’t forget to sand the downside surface of the tool rest and tailstock too.
Now, use some lubrication on soft paper and wipe the surfaces properly. I use the WD-40 (amazon link) for lubrication and remove grease from the steel.
Now set them back on the lathe and you should be able to glide on the bed smoothly.
7. Determine the tool rest height
I’d say this is the most important part. After everything is fixed on a place, it’s time to set the height.
So, what is the ideal height for a wood lathe? Well, it really depends on the turner. We are all different in size and height. So this will vary from person to person.
Let me put this in a simple way. The centerline of your lathe should be at the level of your elbow, that’s it.
So you need to quantify from the tip of the spur center to the lower part of the lathe (without the stand). You will have the desired stand height after subtracting it from your elbow height.
I will publish a full article demonstrating it as there are more things to consider. But for this article, let’s move to the next section.
8. Check the smoothness of the tool rest
When I got my Jet 1221vs, the first thing I changed was the default tool rest with this Robust 12″ (amazon link). I know, many are fine with the default one. But to me, it’s imperative to keep the tool rest surface as plain as possible for a smoother cut.
The problem with these tool rest is that they are made of cast iron that can quickly develop bumpy surfaces with rough chips. This could potentially hinder the whole experience.
So try giving yourself a perfect and smoother cut while using the wood lathe cutting tools.
But again, you can still do it with the one that comes with the lathe but make sure to keep that sharp and flat.
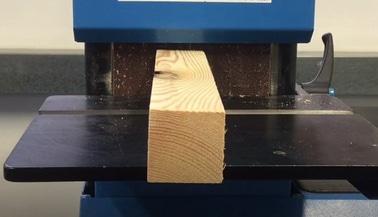
9. Mount the wood blank
Take a square wooden blank and use a center finder (amazon link) to draw the center of each side of the wood. Now take your drive center and gently press the tip into the center point. Adjust the tailstock and lock the other end into the spur center.
You can now mount the log and be silly with a few pen blanks. You may also want to try some epoxy resin to make your own blanks and then start turning them.
Set the RPM you want to set and start attacking the piece slowly. Turn some spindle projects. You could turn a pen or a mallet before you go after the bowls. And when you’re ready, check out more of our wood turning project ideas.
Drawing The Finish Line
I believe that a wood lathe is something you will be using quite frequently once you get a grip on it (which you will). So it’s relevant that set your workspace lathe friendly.
Plan your floor space before buying any full-size wood lathe to make life easier. This could be a one-time process if you do it patiently, and I hope this article will help you process it.
Choose your wood lathe wisely. You can check this article I wrote that will help you select your lathe among the best ones. You can also check this buying guide too.
So that’s all the basic and important things you need to set before start turning your first project.
Turn Big, Turn Safe. Welcome to the turning world!