Disclaimer: As an Amazon affiliate, I may earn a small percentage from qualifying purchases. This is at no extra cost to you. Learn more here.
A lathe is known to be the mother of all machine tools, but they’re costly and require greater space.
The good thing is, you can make one in your workshop and start working on whatever work piece project you have in mind!
You may need a handful of wood, a drill machine, screws and bolts, and a chisel. You will also need some sharp measurement and technical skills.
Here’s a step-by-step guide on making your homemade lathe, plus some useful info you should also learn.
Key Takeaways
- A lathe machine is one of the most flexible and conventionally used tools worldwide.
- Lathes are used in metalworking, cutting metal, metal spinning, woodturning, and glass processing.
- You can make DIY lathes that are great in woodturning and can be used in sharpening and shaping tools.
What Is a Drill Lathe?
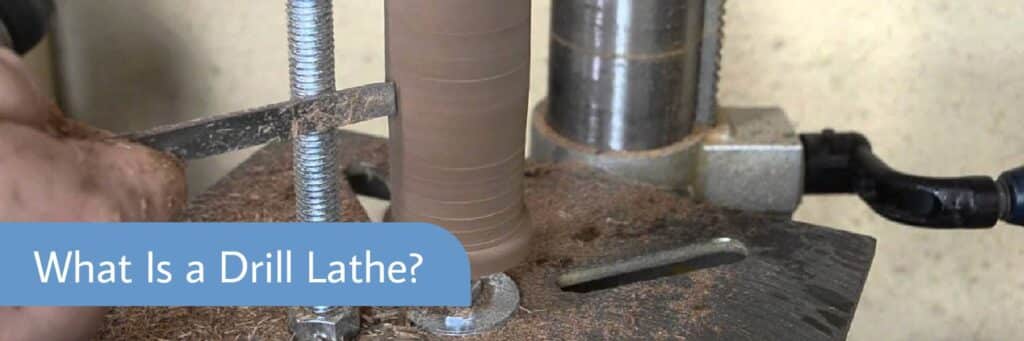
A drill lathe is a machine that can be used for various crafting projects, usually for shaping wood or metal.
The most common items you can make with lathes are crankshafts, camshafts, table legs, bowls, and candlesticks.
As for its parts, lathes have a headstock on the left, and a tailstock on the right.
The drilling method will make use of the center lathe, and the tailstock will be used for drilling with the help of the drill attachment.
The drill chuck consists of a morse taper shaft that can be pushed into the shaft and secured.
The starting point with a center lathe is to utilize the countersink, which is used to drill fairly into the material.
What Is a Drill Lathe Used For?
Lathes can swiftly drill and spin a block and let you remove invariable amounts of it.
When it rotates the work piece at a constant axis, you can cut, sand it, and do the shaping to whatever your skill and creativity is capable of!
Wood and metal lathes can shape work pieces into rounder objects like bowls, wheels, bedposts, pens, lamps, etc.
How to Make a DIY Drill Lathe

WARNING: You’re dealing with sharp and dangerous parts. These aren’t your everyday hand tools!
So play some music, focus, and prepare your skills for this project.
Materials You Will Need
First things first, you need to prepare everything and lay them all out.
You’ll need quite a lot of plywood material and wooden blocks (and measure them accurately, too).
For the base part, prepare the following:
- 12 mm plywood sheet in 35″ x 11″
- 1.25″ x 1.50″ x 35″ wooden blocks (2 Nos.)
- 1.25″ x 1.50″ x 8″ wooden blocks (2 Nos.)
- Screws
For the drill support, prepare the following:
- 12mm plywood in 8.5″ x 10″
- 12mm plywood in 3.5″ x 10″ (2 Nos.)
- Wooden blocks 3/4″ in thickness and 5″ in length
- 2 Nos. 5/16″ bolts 4″ in length with fly nuts and washers
For the tailstock section, prepare the following:
- 2 Nos. 1″ wood strips 14″ in length
- 3 Nos. 19mm plywood pieces in 9″ x 5″
- 1/2″ bolt 8″ in length with a nut
- 1/2″ bolt 2″ in length with fly nut and washer
For the tool rest section, prepare the following:
- 3 Nos. plywood pieces
- 3/8″ bolt
Step 1: Preparing the Base of Your Wood Lathe
The first step is cutting the blocks and plywood into the right proportions and thickness.
You can use 12 mm or 19 mm wood sheets. But for the base board, we recommend using the 12 mm plywood piece.
Cut the wood blocks with the dimensions of 1.25″ x 1.50″ x 35″ for 1 block and 1.25″ x 1.50″ x 8″ for the other.
Step 2: Building the Base
Next, you’ll have to construct the base and attach the pieces together.
Create a 1/2″ slot of 10″ length on a plywood base.
Then, hold the wood base and blocks in place using the screws.
Step 3: Do the Headstock Part
You can use a 13mm capacity drill machine for this part.
Set up the plywood piece using screws, and secure the wooden block with a round hole.
This round hole will fasten the drill to a stable position for the drill support.
Step 4: Build the Tailstock Part
Once the attachment of the drill is stable, you will proceed to the moving part.
So you will need to attach the wood strips to direct the movable part using nails.
Put together all the parts by fixing the movable part using a 1/2″ bolt of 2″ length on one side of the base through the given slot.
The next step will be the attachments of the 1/2″ bolt of 8″ length with a nut and handle. The handle is utilized to efficiently spin the bolt inside out.
Now you can smoothly hold the work piece by using the bolt.
Step 5: Do the Tool Rest Part
Finally, finish the job by working on the tool rest section.
You can secure the tool rest on one side of the base using the bolt and fly nut in the given slot.
You can also adjust the depth shifting in the tool rest portion inside and out by using the fly nut and bolt.
Attach the 22 gauge tin on the tool rest to boost its performance. You can use a chisel for the turning function on the work piece.
TAKE NOTE: A normal chisel is not recommended for lathes, as they cannot consistently defy the forces. Instead, you can use a two-handed chisel.
Your durable woodworking lathe is now ready to use!
You can also watch this video to help you out:
FAQs
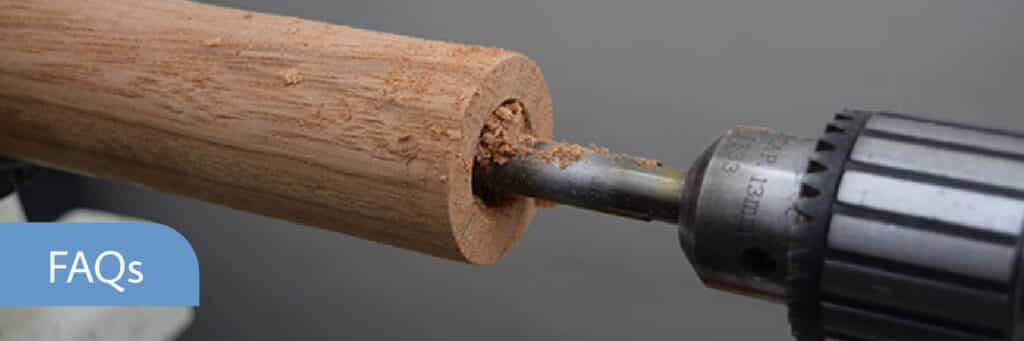
What Can I Use If I Don’t Have a Lathe?
There are some alternatives to lathes if you don’t have the time or budget to buy or build one.
You can modify a drill press, build a pseudo-lathe with a hand drill, or just manually carve your projects by hand.
Here’s a quick and simple guide to using a drill press:
Using a Drill Press
If you need to make small projects like tool handles and pens, and you already have a drill press in your shop, using your drill press as a vertical lathe can be a good alternative.
The drill press will serve as a headstock and has everything you need, like a motor and a spindle. And the base plate of the drill press will be the tailstock.
Once all of that is ready, here’s the step-by-step guide:
- Use a threaded rod for the spindle and attach it to the base plate for the tool rest. This rod should be at the center of the plate.
- In any case, you might cut down the tool rest, but this will depend on the tools you will use in shaping the wood.
- To fix the wood to the drill press, you can cut it in a square and hexagonal shape or round tang at the top.
- Finally, fasten the wood piece in the chuck.
ADDITIONAL NOTES: You can even use the drill press as a sander. You can turn it into a drum sander by making your spindles into sandpaper.
Can You Use a Dremel as a Lathe?
Yes, you can. You will need to identify the power mode; using batteries or an AC plug-in can power the Dremel.
Others would use a Dremel rotary tool, bearings, and wood blocks to start. Then, they would sculpt the head from a 2 x 4 and hone the spindle from a steel rod.
This is a form of mini-lathe, where the tiny pieces can be shaped by hand.
What Should I Avoid Using a Lathe Machine?
Lathes can be harmful if used inappropriately, so you must read and understand the owner’s manual when working with it.
Before you work on your projects, here are a few things that you should avoid:
- Don’t wear gloves, rings, watches, and loose clothing.
- Don’t lean on the machine.
- Don’t adjust the machine while it’s working. Take a moment until it has completely stopped.
- Don’t put your hand on work turning in the lathe.
- Don’t leave the unattended machine while it is operating.
- Don’t use gauges on a workpiece while the machine is moving.
Conclusion
Woodturning is a fun hobby. When you master drilling, it can be a fulfilling activity that will make your workshop your personal happy space.
If you’re more of a visual learner, you could also always watch video ideas on the web for inspiration.
Nevertheless, we hope this guide helped you out!
Check out our buying guide for the best wood lathes and projects you can do with them!