Disclaimer: As an Amazon affiliate, I may earn a small percentage from qualifying purchases. This is at no extra cost to you. Learn more here.
Did you start working in a factory or have an upcoming high school project? Or do you have a plan to set up your new home workshop and try to run a test first with a beginner’s metal lathe?
You may have theoretical knowledge about almost everything in the factory. But do you have any field experience?
The answer may be “no.” Well, that’s nothing to be concerned about. Many of the newbies have felt the same.
Now, Metal Lathe may be the next thing you have to work with. And you can’t help feeling nervous about that.
Never mind, I am here to guide you out of this problem. Before going through the working process, let’s revise what a Metal Lathe machine is.
What Is A Metal Lathe Machine?
The metal lathe is a machining apparatus used to shape metal pieces by holding and rotating them by the lathe. At the same time, a tool bit is moved forward into the work for cutting action.
The lathe machine has been developed a lot for producing screw threads, drilling, cutting, tapping, turning, etc., of metal nowadays. In contrast, the basic lathe was designed to cut cylindrical metal stock only.
For more general information on lathes make sure to read my article what is a lathe?.
Things You Need to Know Before Starting
The lathe has two ends, the headstock, which spins, and the tailstock, which stays still to support the workpiece. There are two typical measurements in lathes to look into. One is the distance between the centers of the headstock and the tailstock moving it into the end.
The other measurement is called the center height. It generally gives the idea of the swing measurement while purchasing a lathe. Swing measurement denotes the distance between the center of the headstock and the bed.
Some of the small metal lathes have only three speeds or pulse width modulated DC motors. On the contrary, some might have gearboxes that can be even up to 6-speed gearboxes starting from 140 to 1710 rpm to rotate the spindles.
However, some gears in some of the lathes change the speed of the lead screw.
How to Use A Metal Lathe: General steps
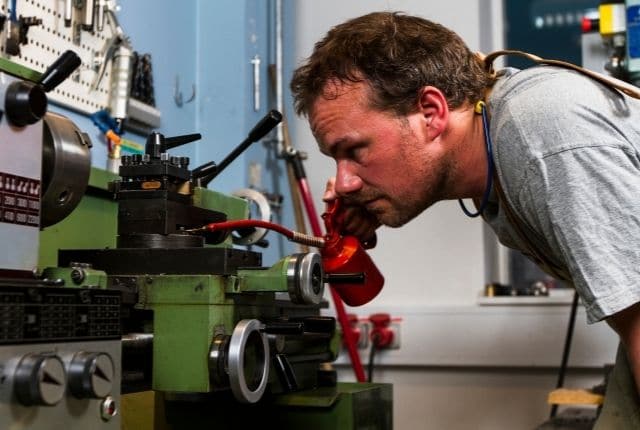
This is more of a topic that rather needs to be demonstrated in a video. Metal Lathes are used for numerous projects. Each of them is different in operations like cutting, drilling, boring, etc.
Basically, a lathe will let you shape any object into a cylindrical form. It can be a block of wood, metal, steel, plastic, aluminum, acrylic, and many more. On the contrary to wood lathes, metal lathes can work with any possible materials if the tool bits are strong and sharp enough to tackle.
It’s quite impossible to write all of them in one article as the main aspect is how to run the machine. But as you are my guest today, I would like to give you a simple, easy step as a glimpse of what this could be.
Imagine you have bought a new lathe and now ready for your first turn. All the steps here are to help you imagine the scenario. You better need to search each step on youtube to see demonstrative videos.
Primary Steps To Use Metal Lathes
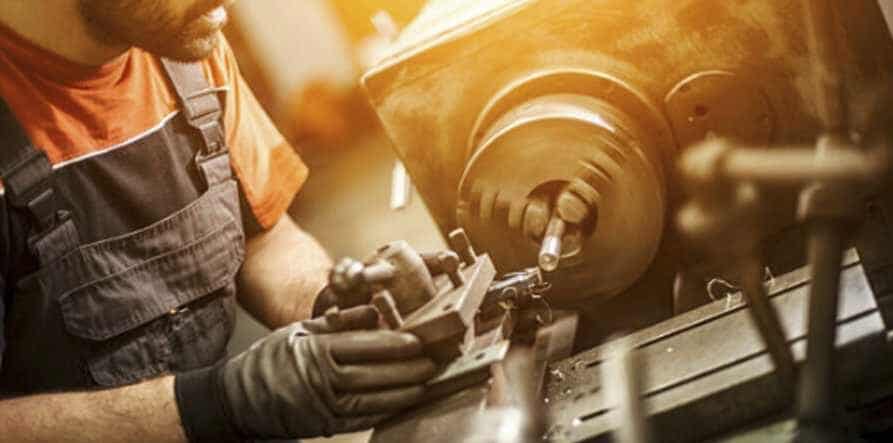
- First, you need to set up the lathe and the cutting tool according to your project. Small bench lathes are usually mounted on a sturdy bench or pedestal.
- Mount the workpiece into the headstock of the lathe using a holder called the “jaw chuck.”
- Most of the modern mini-lathe come with a chuck guard. Put that guard on, select the direction of the rotation, and then turn on the lathe.
- Rotate the lathe at a certain RPM, and don’t ever forget to wear the protective gear.
- Now, slowly move your tool post near the rotating workpiece and try to give a light pass.
- Slide the carriage as per your needs to set the cutting tool.
- There are different types of cutting tools to perform different operations. Slowly scrape out the materials from the surface of the mounted workpiece. Keep going until the final result.
- Turn off the switch after performing your first light pass and go again.
- After completing the passes with the tools, you will now have the workpiece moving towards your desired shape—for example- Doorknobs, metal mallets, key rings, metal rings, threads, etc.
Now I know it is easier said than done as there is so much more into it.
There are several methods to complete the process, such as turning, chamfering, drilling, boring holes, threading, parting, and the list goes on. Each has its unique technique and results.
So, you have to be patient and give it time to master all the processes as there is no shortcut to it.
Let’s get into a complicated one.
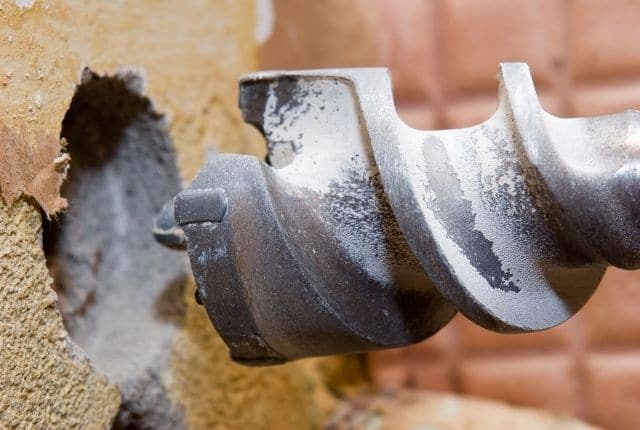
Drilling With The Lathe
You can also drill out a piece at the center using the tailstock. Use the lever at the back of your tailstock to pop in the drilling tool and lock it down.
Bring it over to the rotating workpiece, and that’s it. You can make a hole in the object. Remember to use lubricant while drilling, as it will make your tool last longer.
Drilling will take only four steps if you do it in a machinist way. So here are the steps-
1. Center drilling
The purpose of center drilling is to get our holes started precisely on the axis of the lathe. A center drill, unlike a regular drill, is very very rigid it’s short and it cuts right on the point which regular drills do not. This allows us to get this hole started right on the center axis so that all of our subsequent tools will be naturally guided to where we want them to go.
Set your spindle speed at high because the surface center of the bit is going to be very low and you’ll need proper feet per minute for cutting edges on the center drills. Set them at least at 1000 RPM, that’ll do it.
Also, do put some cutting oil on the central drill.
Pilot drilling
The first purpose of pilot drilling is to help ensure that our larger drill bit goes straight and the other one is to make clearance for the chisel tip on the end of the larger drill.
Because if the chisel tip is too large you can’t do any cutting. So, you need to make clearance for that.
Then you also need to make sure to clear the chip off from your drill. An easy way to clear your chips is to unlock the tailstock slide the whole tailstock out and then push it back in and that will allow you to kind of save your setting on the tailstock Ram.
Larger size drill
It’s time for you to start drilling to create a large hole inside.
So chuck up your larger drill and go about 0.5 millimeters under your final reamer size and slowed down your lathe by 60% now.
After that, you should be able to come down to the final depth. So loosen the tailstock and slide back the drill out.
Reamer drilling
It’s time for drilling with our reamer.
- Firstly, I would like you to remember here is, don’t ever run them backward. This is the number one rule.
- Secondly, don’t try to unscrew it if possible because you will ruin the cutting edges on them.
Finally, it’s time to chuck the reamer up with the lathe. Try to remember few things here as well-
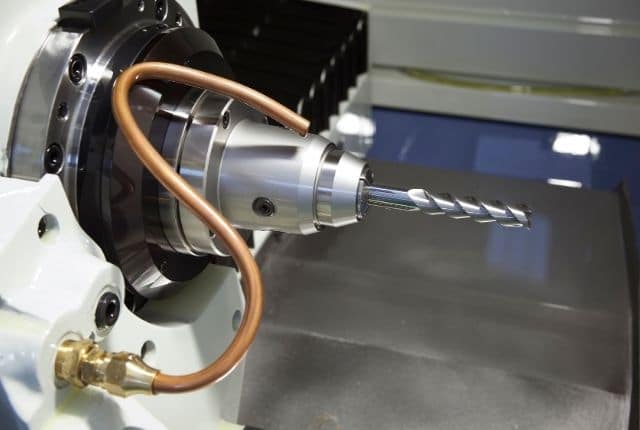
- Use lots of cutting fluids during the time of drilling.
- Run the spindle slower than regular drilling RPM. For example, 250-300 RPM would be ideal.
- Clear the chips frequently because they don’t have spiral flutes like the female ones. Above all, be very patient with them.
So, that’s literally all the basics you need to use a metal lathe. If you still want to know something in detail, you can always contact me in person.
Sharpening drill bits with a metal lathe
Let’s say you want to sharpen the drill bits with the help of a metal lathe, which is mostly done with a grinding tool.
In the bit sharpening operation, you will have to use a bit and a piece of aluminum. Before starting, you need to understand some terms of the bit.
Watch the bit from different angles, and you’ll find some edges on that. Those are called back rake, which is the angle on the top of the bit.
There are positive, negative, and zero back rakes if you see them from the side. Negative bits are generally used for high force cutting. We are going to use positive rakes in this operation.
There is also a side rake; that angle affects chip dispersal and heat also.
Nose radius is another thing I would suggest to help your bit from cracking or chipping out faster.
When it comes to grinding your bit, you have to think about the clearance angle. Think about a piece coming at your left side. If you place the bit horizontally to the object, it would be turning, and if vertically, it would be facing.
If you want to cut a shoulder, you have to make sure there’s a clearance angle between the workpiece and the bit. The next thing you are going to do is making your bit centered up. Whatever it is, a three-jaw chuck or four-jaw chuck, bring the chucks altogether using your chuck key.
Work Process
Now put the bit in the bit holder and tighten it properly. Bring the tool holder with the bit mounted on it closer to the center of the chuck as much as possible. Find the exact center of the chuck and tighten the tool holder when you’re done.
Put the aluminum piece that we’re using between the jaws of the chuck and tighten it properly. Turn on the spin. Remember, the centering you did can’t always be perfect, so you might have to make some adjustments depending on the cut.
Next, manually bring the tool holder closer to the workpiece and horizontally with the turning’s aluminum. You can see the angle allowing the curls coming out of the piece to drop back and off the bit. It’s not going forward to stick up into the chuck or spinning component.
Move the bit in a vertical line with the aluminum, and it will do the facing. So, you can do both the turning and facing on the same bit. This type of face cut is typically good for soft materials like steel or aluminum etc.
A good way to ensure if the bit is still centered up is to find edges on the facing surface. If there’s any, then move your bit a little higher, and that’ll do.
A Few Tips to Help You Remain Safe
- Try to avoid full sleeve dresses while working. Do not wear a tie or apron or anything that hangs up. Remove rings and watches before you start working.
- Whenever you need to make adjustments, stop the lathe.
- Never use your hands to remove chips and swarf. Use pliers or a brush.
- Wait until the lathe stops completely before you change spindle speeds.
- Use protective eye gear while working.
- Do not forget to remove wrenches and chuck keys before operating.
- Sharp cutters, centers, and drills can be dangerous, so handle them with care.
- Keep your full concentration on what you’re doing. Slight inattention can cause a serious accident.
Automatic Feed for Ease of Working
A manual feed did the whole process. But lathe machines can have an automatic feed. Automatic feed refers to the gears mounted on the back of your lathe. You can change these different gears for different speeds for operations like threading and so on.
You’ll find a chart on the back of your gearbox door about what gears you use for which work, speed, etc. Activating automatic feed will reduce your job and will automatically pull the feed towards the headstock.
These can be used for both facing and turning as there is an automatic feed both in and out.
Using Live Center
Instead of having a small piece of the workpiece, if you have a longer one, then you have to support it at the end to perform the turning operation. You can support the object with a live center with bearings and spin with the object.
Recommended Metal Lathes for Beginner Machinists
Here are some metal lathes that I would recommend to anyone, no matter the experience. Moreover, you can check my recommended mini lathes for a broader view and options.
I would also suggest checking my guideline and checklist before buying one.
1. BestEquip Metal Lathe 8×16 Inch 750W: Best Overall
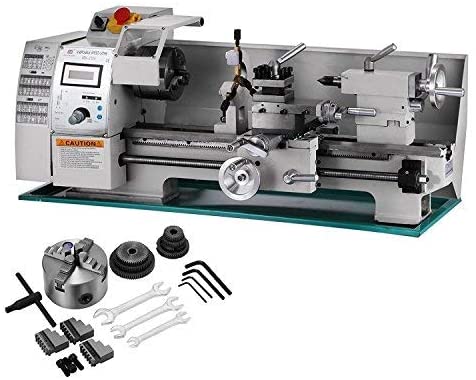
- 7″ Bed swing and 12″ distance between centers
- Motor: 550W, 110V, 1 phase
- Spindle Speed: 02250 RPM variable speed
- Spindle Bore: 0.83″
- Spindle Accuracy: 0.0004″
- Swing over cross slide: 4.3
- Top slide travel: 1.38″
- Cross slide travel: 2.56″
- Tail Stock Taper: MT2
- Spindle Taper: MT3
- Both Forward and Reverse
- Weight: 57.2 lbs
- Warranty: Contact seller
2. BestEquip Metal Lathe 7″ x 14″: If you’re on a tight budget

- 7″ swing and 14″ between centers
- Motor: 550W DC Single Phase
- Spindle Speed: 0-2250 RPM
- Infinitely Variable Speeds
- Swing Over Cross Slide: 110mm
- Tailstock Taper: Mt2
- Spindle Taper: Mt3
- Cross Slide Travel: 65mm(2.53″)
- Chuck Diameter: 100mm(3.94″)
- Inch Thread: 12-52 T.P.I
- Spindle Accuracy: 0.01mm
- Weight: 101.9 lbs
3. Grizzly G8688 7” x 12” Mini Metal Lathe
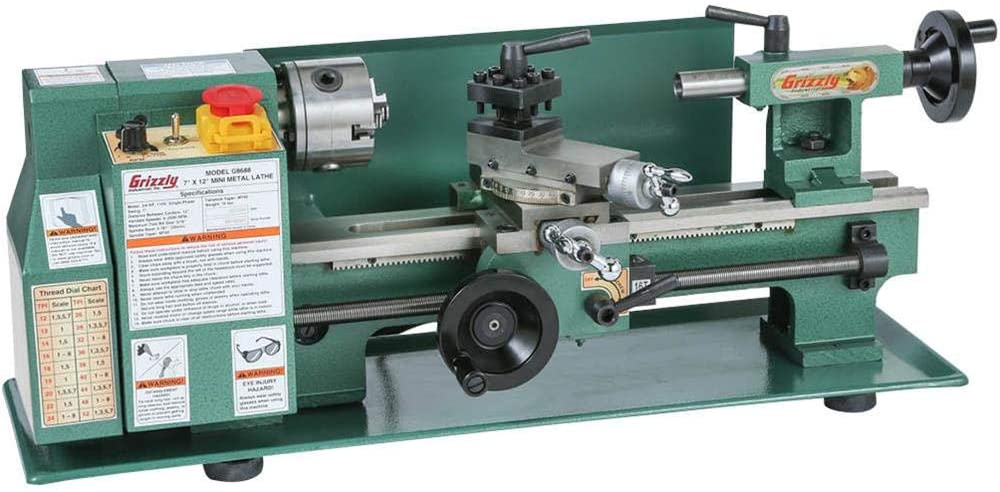
- 12″ bed swing, 36″ between centers
- Motor: 2 HP, 220V, single-phase, 1725 RPM
- Spindle speeds: 9 speed (70-1400) RPM
- Bed width: 7-1/4″
- Spindle bore: 1.57″
- Spindle taper: MT#5a
- Tailstock barrel taper: MT#3
- One MT#3 live center
- Two MT#3 dead centers
- Swing over cross slide: 7″
- Weight: 1251 lbs
- Warranty: 2 years
Conclusion
Whether it’s a hobby or job, learning how to operate or work with a metal lathe can give you a handful of benefits. You can make various kinds of objects on your own for household use and so on. Besides, if you can learn and handle the device properly, it can even provide you a well-paying career.
I’ve tried my best to cover all the things that you need to learn and operate the lathe in this article in short.
Last but not least, try to avoid taking too much material at once; make smaller pieces if you can. Work with patience, begin your work slowly, and measure your work as you go.