Disclaimer: As an Amazon affiliate, I may earn a small percentage from qualifying purchases. This is at no extra cost to you. Learn more here.
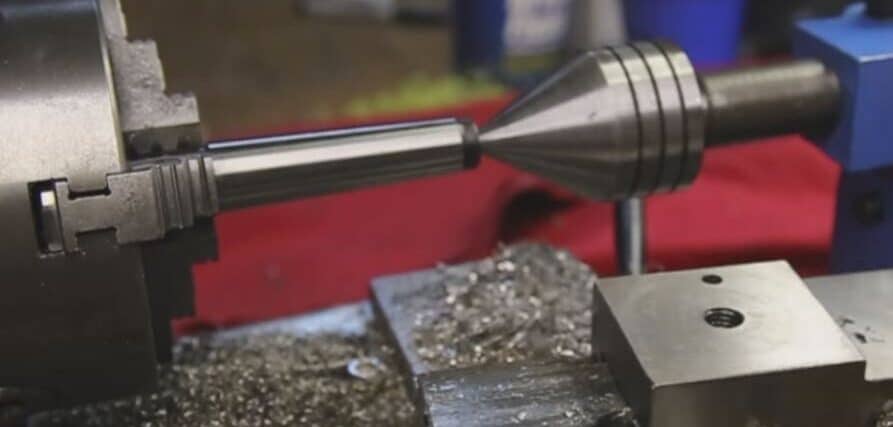
You may already know that a lathe is a multifunctional machine for boring, milling, cutting, drilling, and turning.
With the aid of some methods, you can efficiently perform the aforementioned operations. Among all these operations, turning is the simplest one.
Workers do it to minimize the width of the cylindrical bar. If there is any necessity of a specific taper on the workpiece, workers go for a taper turning operation.
But how do we do this? Read on to delve deeper into the methods of taper turning.
Related topic: Lathe chuck mounting methods
Different Taper Turning Methods
You can cut a taper on a lathe by using these methods below. Let’s see the details of how these methods work and when you use them.
1. Form Tool Method
This is a secure method to make a short taper. The form is landed and used as per the requirement.
The feed and lathe axis both work parallel. However, the form of the cutting tool maintains the taper angle. You can use cross and longitudinal feed simultaneously.
Moreover, you should keep the taper length more significant than the edge length of tool cutting.
The process creates extensive vibration. It happens because the whole cutting edge demolishes the metal.
Thus, it requires heavy force even though the work is done at a slow speed. The vibration depends on the size of the tool.
Pros
✅ Simplest method
✅ Pretty precise
Cons
❌ Produces huge vibrations
2. Tailstock Set Over Method
When there is no available taper attachment, this method is used then. In this method, the machine bed axis is set with an angle where the axis of the job rotates.
The tool moves in a parallel position with the machine bed. Instead of degrees, the basis value of the tailstock is offset in mm or inches.
As the work is mainly at an angle, it should be done between centers. Once the turning operation is done, utmost care should be given to set back the tailstock.
How to set a parallel position? These are the steps:
- To grip a piece of paper within the taper surface and tool, move the nose of the tool to the left edge of the taper.
- Check on the crossfeed dial reading. Take out the tool.
- Advance the tool to the right edge of the taper to grip the paper.
- Take the reading; the set over is perfect if it corresponds.
Let’s see the steps of this setting over:
- Slightly detach the clamp of the tailstock.
- Until you get the required set over keep adjusting the screws.
- Arrange the tool as a parallel turning.
- Try a rough cut.
- Polish the size if you get the desired taper.
Pros
✅ Longer jobs can be tapered with the help of automatic feed, you can get a better surface
✅ You can cut the outer taper threads
Cons
❌ No way to cut the sheer taper
❌ No option to remove the inner taper
3. Compound Slide Method
To produce a short and steep taper, the compound slide method is the suggested method. Like any other lathe operation, the workpiece is set in the chuck with clamps in this method.
The job rotates along with the lathe axis. Before clamping, the compound rest should be swiveled to the desired angle.
The flexibility of the compound slide can rotate on its central pins in both directions because it is fixed on the top of the cross slide.
You can perform taper turning on both outsides of the workpiece or in the bore.
The compound slide has two basic principles. One is that it’s cutting tool moves just the way you want to. Because you can adjust your desirable angle by loosening the nuts.
And the other is, the job axis rotates in parallel to the axis of the lathe bed.
The tool post is used for setting the cutting tool. By turning the screw, you can give feed along the desire path and angle.
While the tool travels, following the path of the compound slide, you get your required tapper.
Pros
✅ You can get the better, steeper and shorter taper
Cons
❌ Low fining and low product efficiency
❌ You can cut only a short taper
Here are a few key tips for you if you are using the compound slide method-
- Overhanging of the tool is risky.
- Be careful when setting the tool height point in the center.
- Use lubricant oil.
4. Taper Turning Attachment Method
Job attachment is a little bit different here. The bottom bracket or tray is to be used for this attachment.
The workpiece attaches to the rear end of the lathe bed. For your desired turning angle, a guiding bar is used here.
This bar has the ability to swing, hence provide flexibility in angle. The guiding bar also functions as its center while performing the operation.
With the help of a guide block, it moves on the guide bar.
The guide block connects the rear end of the crossing slide and helps to move. In order to connect the cross slide, the binder screw should be removed.
So, the cross slide is free from the slide screw. Like compound slide, it also has degree graduations. With this method, you can perform any size of turning in your operation.
How Tapper Turning Attachment Works
This attachment is kind of a guide form set in the backside of the lathe and regulates with the axis of the lathe, keeping the lathe in the track of the center.
But this helps to free the cross slide, alongside guiding it on the track of the taper to be cut.
The bracket that is attached to the lathe bed carries a guide bar. And you can swivel the guide to your desired angle. In this method, a bolt clamps the guide bar properly in place.
With the help of the link and lock, the guide block is connected to the cross slide of the lathe.
Hence it is completely free to slide along the guide bar. It also allows the cross to travel freely on its way.
But for that free movement, it has to be disconnected from the saddle. To disconnect the cross slide on the longitudinal feed of the saddle just loosen the cross-feed screw.
You have to set the depth of cut for the tool after each cut. Like all other methods, we use the rotating handle of the compound slide to feed the tool a perfect depth of cut.
Set the compound slide at the normal position, as in 90°.
Also, the position of the guide bar will be in parallel with the taper tool. Moreover, the guide bar reads the scale indicator it spindles on the taper angle.
Advantages of Taper Turning
- Attachment setting is easy and quick
- This method does not hamper the regular lathe set up
- Finishing is better
- Both internal and external taper can be given
- You can use the attachment as taper turning threads
Shortcomings of Taper Turning with details
- Imperfect Taper:
If the setting on the tailstock, compound slide, or taper turning attachment is not perfect, getting an imperfect taper will be nothing surprising. To avoid this, make sure the setting is minutely accurate.
- Improper Dimensions of the Taper:
This also happens because of wrong settings.
- Faulty Diameters:
Often it happens that both the diameter of one side and the angle of tapers are accurate, but the diameter of the other edge is not accurate. The inaccurate length of the taper is the reason for this defect. Carefully checking the length of the taper can prevent this.
Final Word
That is all about the taper cutter method of a lathe machine. One important confusion to be cleared here is, it’s not necessary you perform taper cutting with a full-size lathe, you can do it with a mini-size lathe too.
Hopefully, this article has met your knowledge regarding taper turning. If you have any questions or queries, feel free to comment in the comment section.